This is a tutorial on creating a PHP website template starting with
HTML and CSS. We will start with the basics and you can also download
the final product. Please remember that I am using very basic CSS
styling in this example just for you to get the idea, and not so much to
make it look pretty. The download will contain both the styled example
as well as a complete blank template that you can use for your own
starting point for any project personal or commercial. The demo files
are released under GPL V2.

This tutorial assumes you have basic understanding of html and css.
At the end of this tutorial you should have a basic understanding of
using php and converting an html site to php.You can also download the
demo files
here.
The actual template will be created in 10 easy steps. I will then
take it a step further to show you how to add variables to your
template.
Setting up the File structure and Folders
Step One
Let’s start by creating a new folder. I have named this folder php_site
Inside of this folder we are now going to create two new files. One
is index.html and the other file is going to be named style.css
Step Two
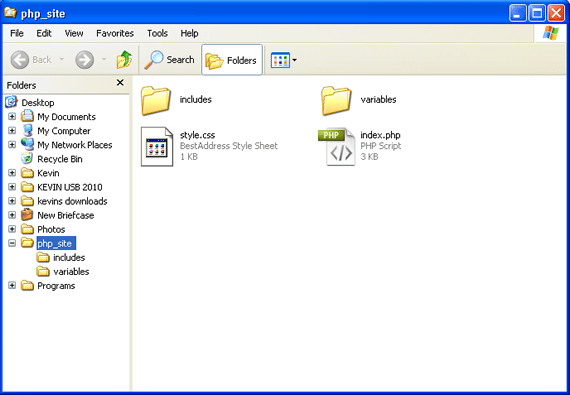
Now we are going to create two more folders inside of our main
folder. The first folder is going to be named includes, and the second
folder will be named variables.
We should now have a setup that looks like the following:

Step Three
Now, using your favorite html editor open the index.html file. We are
going to to create a basic html website document. This is the code I am
using:
7 | <meta http-equiv="content-type" content="text/html; charset=utf-8" /> |
9 | <meta name="description" content="" /> |
11 | <meta name="keywords" content="" /> |
13 | <meta name="author" content="" /> |
15 | <link rel="stylesheet" type="text/css" href="style.css" media="screen" /> |
17 | <title>1stWebDesigner PHP Template</title> |
Step Four
Now I am going to open up the style.css file and add the divs we will
be using. I have added very basic styling so you can see the site and
get the idea of what we are doing. Remember that you can use your own
styling when creating your website to suit your needs.
This is the CSS I am adding to the stylesheet:
2 | background-color:#f1f1f1; |
3 | font-family: georgia,sans-serif; |
11 | background-color:#f8f8f8; |
13 | border-left:1px solid #ccc; |
14 | border-right:1px solid #ccc; |
22 | border-bottom:1px solid #ccc; |
23 | border-top:1px solid #ccc; |
33 | border-bottom:1px solid #ccc; |
40 | background-color:#f1f1f1; |
44 | background-color:#bababa; |
72 | border-top:1px solid #ccc; |
Step Five
Next we will create some more files that we will be using when we start converting our template to php.
Open up the folder we created inside of our main folder called variables. Next, create a blank file called variables.php

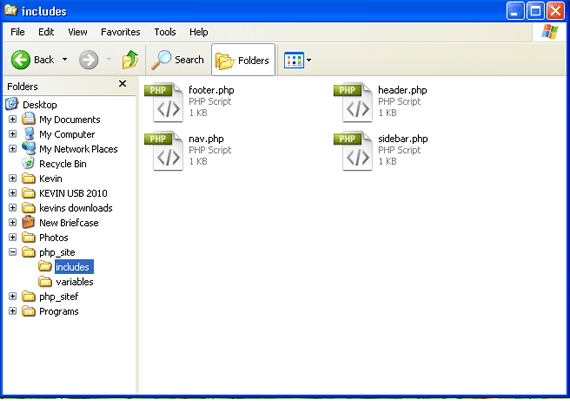
Then go into the other folder we created called includes and create the following files:
header.php
nav.php
sidebar.php
footer.php
Step Six
Now we will need to add some content to our index.html file. I have
filled in the header area with an H2 tag for the website header title. I
will also be adding the links in the nav area, as well as some text in
the content area, sidebar, and footer. The final index.html file now
looks like this:
7 | <meta http-equiv="content-type" content="text/html; charset=utf-8" /> |
9 | <meta name="description" content="" /> |
11 | <meta name="keywords" content="" /> |
13 | <meta name="author" content="" /> |
15 | <link rel="stylesheet" type="text/css" href="style.css" media="screen" /> |
17 | <title>1stWebDesigner PHP Template</title> |
27 | <h2>1stWebDesigner PHP Template</h2> |
35 | <a href="#">Portfolio</a> |
36 | <a href="#">Contact</a> |
48 | <h3>Paragraph Element</h3> |
52 | Quisque
pellentesque sodales aliquam. Morbi mollis neque eget arcu egestas non
ultrices neque volutpat. Nam at nunc lectus, id vulputate purus. In et
turpis ac mauris viverra iaculis. Cras sed elit a purus ultrices iaculis
eget sit amet dolor. Praesent ac libero dolor, id viverra libero.
Mauris aliquam nibh vitae eros sodales fermentum. Fusce cursus est
varius ante vehicula eget ultrices felis eleifend. Nunc pharetra rutrum
nibh et lobortis. Morbi vitae venenatis velit. |
58 | Quisque
pellentesque sodales aliquam. Morbi mollis neque eget arcu egestas non
ultrices neque volutpat. Nam at nunc lectus, id vulputate purus. In et
turpis ac mauris viverra iaculis. Cras sed elit a purus ultrices iaculis
eget sit amet dolor. Praesent ac libero dolor, id viverra libero.
Mauris aliquam nibh vitae eros sodales fermentum. Fusce cursus est
varius ante vehicula eget ultrices felis eleifend. Nunc pharetra rutrum
nibh et lobortis. Morbi vitae venenatis velit. |
62 | <h3>Another Heading Starting Point</h3> |
66 | Quisque
pellentesque sodales aliquam. Morbi mollis neque eget arcu egestas non
ultrices neque volutpat. Nam at nunc lectus, id vulputate purus. In et
turpis ac mauris viverra iaculis. Cras sed elit a purus ultrices iaculis
eget sit amet dolor. Praesent ac libero dolor, id viverra libero.
Mauris aliquam nibh vitae eros sodales fermentum. Fusce cursus est
varius ante vehicula eget ultrices felis eleifend. Nunc pharetra rutrum
nibh et lobortis. Morbi vitae venenatis velit. |
72 | Quisque
pellentesque sodales aliquam. Morbi mollis neque eget arcu egestas non
ultrices neque volutpat. Nam at nunc lectus, id vulputate purus. In et
turpis ac mauris viverra iaculis. Cras sed elit a purus ultrices iaculis
eget sit amet dolor. Praesent ac libero dolor, id viverra libero.
Mauris aliquam nibh vitae eros sodales fermentum. Fusce cursus est
varius ante vehicula eget ultrices felis eleifend. Nunc pharetra rutrum
nibh et lobortis. Morbi vitae venenatis velit. |
81 | <li><a href="#">Home</a></li> |
82 | <li><a href="#">About Us</a></li> |
83 | <li><a href="#">Links</a></li> |
84 | <li><a href="#">Portfolio</a></li> |
85 | <li><a href="#">Contact</a></li> |
88 | <li><a href="#">Link Here</a></li> |
89 | <li><a href="#">Link Here</a></li> |
90 | <li><a href="#">Link Here</a></li> |
91 | <li><a href="#">Link Here</a></li> |
92 | <li><a href="#">Link Here</a></li> |
95 | <li><a href="#">Link Here</a></li> |
96 | <li><a href="#">Link Here</a></li> |
97 | <li><a href="#">Link Here</a></li> |
98 | <li><a href="#">Link Here</a></li> |
99 | <li><a href="#">Link Here</a></li> |
Step Seven
Now we will start converting our template to PHP. We will need to
take a brief look at the html code we have and decide which areas will
be sliced. We will be removing specific areas from the index.html file
and placing them into the php files we have created inside the includes
folder.
Let’s start with the top of the html document on the header. Copy the
header div and cut it from the document. Then open your includes
folder, and the header.php file we created and add the code to the
header.php
header.php
3 | <h2>1stWebDesigner PHP Template</h2> |
5 | </div> <!-- end #header --> |
Make sure this area has now been removed completely from the
index.html file and placed into the header.php file. In place of this
code, we will now add the following to the index.html file.
1 | <?php include('includes/header.php'); ?> |
Now our index.html should look like this: (Make a note that the
header area has now been replaced with our php include function that is
calling our external header.php file)
7 | <meta http-equiv="content-type" content="text/html; charset=utf-8" /> |
9 | <meta name="description" content="" /> |
11 | <meta name="keywords" content="" /> |
13 | <meta name="author" content="" /> |
15 | <link rel="stylesheet" type="text/css" href="style.css" media="screen" /> |
17 | <title>1stWebDesigner PHP Template</title> |
25 | <?php include('includes/header.php'); ?> |
31 | <a href="#">Portfolio</a> |
32 | <a href="#">Contact</a> |
44 | <h3>Paragraph Element</h3> |
48 | Quisque
pellentesque sodales aliquam. Morbi mollis neque eget arcu egestas non
ultrices neque volutpat. Nam at nunc lectus, id vulputate purus. In et
turpis ac mauris viverra iaculis. Cras sed elit a purus ultrices iaculis
eget sit amet dolor. Praesent ac libero dolor, id viverra libero.
Mauris aliquam nibh vitae eros sodales fermentum. Fusce cursus est
varius ante vehicula eget ultrices felis eleifend. Nunc pharetra rutrum
nibh et lobortis. Morbi vitae venenatis velit. |
54 | Quisque
pellentesque sodales aliquam. Morbi mollis neque eget arcu egestas non
ultrices neque volutpat. Nam at nunc lectus, id vulputate purus. In et
turpis ac mauris viverra iaculis. Cras sed elit a purus ultrices iaculis
eget sit amet dolor. Praesent ac libero dolor, id viverra libero.
Mauris aliquam nibh vitae eros sodales fermentum. Fusce cursus est
varius ante vehicula eget ultrices felis eleifend. Nunc pharetra rutrum
nibh et lobortis. Morbi vitae venenatis velit. |
58 | <h3>Another Heading Starting Point</h3> |
62 | Quisque
pellentesque sodales aliquam. Morbi mollis neque eget arcu egestas non
ultrices neque volutpat. Nam at nunc lectus, id vulputate purus. In et
turpis ac mauris viverra iaculis. Cras sed elit a purus ultrices iaculis
eget sit amet dolor. Praesent ac libero dolor, id viverra libero.
Mauris aliquam nibh vitae eros sodales fermentum. Fusce cursus est
varius ante vehicula eget ultrices felis eleifend. Nunc pharetra rutrum
nibh et lobortis. Morbi vitae venenatis velit. |
68 | Quisque
pellentesque sodales aliquam. Morbi mollis neque eget arcu egestas non
ultrices neque volutpat. Nam at nunc lectus, id vulputate purus. In et
turpis ac mauris viverra iaculis. Cras sed elit a purus ultrices iaculis
eget sit amet dolor. Praesent ac libero dolor, id viverra libero.
Mauris aliquam nibh vitae eros sodales fermentum. Fusce cursus est
varius ante vehicula eget ultrices felis eleifend. Nunc pharetra rutrum
nibh et lobortis. Morbi vitae venenatis velit. |
77 | <li><a href="#">Home</a></li> |
78 | <li><a href="#">About Us</a></li> |
79 | <li><a href="#">Links</a></li> |
80 | <li><a href="#">Portfolio</a></li> |
81 | <li><a href="#">Contact</a></li> |
84 | <li><a href="#">Link Here</a></li> |
85 | <li><a href="#">Link Here</a></li> |
86 | <li><a href="#">Link Here</a></li> |
87 | <li><a href="#">Link Here</a></li> |
88 | <li><a href="#">Link Here</a></li> |
91 | <li><a href="#">Link Here</a></li> |
92 | <li><a href="#">Link Here</a></li> |
93 | <li><a href="#">Link Here</a></li> |
94 | <li><a href="#">Link Here</a></li> |
95 | <li><a href="#">Link Here</a></li> |
100 | <p>Copyright © 2010 <a href="#">Website Name</a></p> |
Step Eight
Now we will continue to slice the html document and place the code in the proper php files we made.
Next let’s move to the nav div. The same as above, we are going to
copy and cut that piece of code and place it into our nav.php file that
is located inside of the includes folder.
This is what we are adding to the nav.php file:
5 | <a href="#">Portfolio</a> |
6 | <a href="#">Contact</a> |
8 | </div> <!-- end #nav --> |
Again we will replace the code removed from the html document with the following:
1 | <?php include(includes/nav.php); ?> |
Now our index.html document will look like this: (Again note that
both the header, and the nav area are now replaced with php includes)
7 | <meta http-equiv="content-type" content="text/html; charset=utf-8" /> |
9 | <meta name="description" content="" /> |
11 | <meta name="keywords" content="" /> |
13 | <meta name="author" content="" /> |
15 | <link rel="stylesheet" type="text/css" href="style.css" media="screen" /> |
17 | <title>1stWebDesigner PHP Template</title> |
25 | <?php include('includes/header.php'); ?> |
27 | <?php include('includes/nav.php'); ?> |
37 | <h3>Paragraph Element</h3> |
41 | Quisque
pellentesque sodales aliquam. Morbi mollis neque eget arcu egestas non
ultrices neque volutpat. Nam at nunc lectus, id vulputate purus. In et
turpis ac mauris viverra iaculis. Cras sed elit a purus ultrices iaculis
eget sit amet dolor. Praesent ac libero dolor, id viverra libero.
Mauris aliquam nibh vitae eros sodales fermentum. Fusce cursus est
varius ante vehicula eget ultrices felis eleifend. Nunc pharetra rutrum
nibh et lobortis. Morbi vitae venenatis velit. |
47 | Quisque
pellentesque sodales aliquam. Morbi mollis neque eget arcu egestas non
ultrices neque volutpat. Nam at nunc lectus, id vulputate purus. In et
turpis ac mauris viverra iaculis. Cras sed elit a purus ultrices iaculis
eget sit amet dolor. Praesent ac libero dolor, id viverra libero.
Mauris aliquam nibh vitae eros sodales fermentum. Fusce cursus est
varius ante vehicula eget ultrices felis eleifend. Nunc pharetra rutrum
nibh et lobortis. Morbi vitae venenatis velit. |
51 | <h3>Another Heading Starting Point</h3> |
55 | Quisque
pellentesque sodales aliquam. Morbi mollis neque eget arcu egestas non
ultrices neque volutpat. Nam at nunc lectus, id vulputate purus. In et
turpis ac mauris viverra iaculis. Cras sed elit a purus ultrices iaculis
eget sit amet dolor. Praesent ac libero dolor, id viverra libero.
Mauris aliquam nibh vitae eros sodales fermentum. Fusce cursus est
varius ante vehicula eget ultrices felis eleifend. Nunc pharetra rutrum
nibh et lobortis. Morbi vitae venenatis velit. |
61 | Quisque
pellentesque sodales aliquam. Morbi mollis neque eget arcu egestas non
ultrices neque volutpat. Nam at nunc lectus, id vulputate purus. In et
turpis ac mauris viverra iaculis. Cras sed elit a purus ultrices iaculis
eget sit amet dolor. Praesent ac libero dolor, id viverra libero.
Mauris aliquam nibh vitae eros sodales fermentum. Fusce cursus est
varius ante vehicula eget ultrices felis eleifend. Nunc pharetra rutrum
nibh et lobortis. Morbi vitae venenatis velit. |
70 | <li><a href="#">Home</a></li> |
71 | <li><a href="#">About Us</a></li> |
72 | <li><a href="#">Links</a></li> |
73 | <li><a href="#">Portfolio</a></li> |
74 | <li><a href="#">Contact</a></li> |
77 | <li><a href="#">Link Here</a></li> |
78 | <li><a href="#">Link Here</a></li> |
79 | <li><a href="#">Link Here</a></li> |
80 | <li><a href="#">Link Here</a></li> |
81 | <li><a href="#">Link Here</a></li> |
84 | <li><a href="#">Link Here</a></li> |
85 | <li><a href="#">Link Here</a></li> |
86 | <li><a href="#">Link Here</a></li> |
87 | <li><a href="#">Link Here</a></li> |
88 | <li><a href="#">Link Here</a></li> |
93 | <p>Copyright © 2010 <a href="#">Website Name</a></p> |
Step Nine
Now it is time to do the sidebar. Copy and cut the sidebar div and
place it into the sidebar.php file we created that is located inside the
includes folder.
This is the code we are adding:
sidebar.php
4 | <li><a href="#">Home</a></li> |
5 | <li><a href="#">About Us</a></li> |
6 | <li><a href="#">Links</a></li> |
7 | <li><a href="#">Portfolio</a></li> |
8 | <li><a href="#">Contact</a></li> |
11 | <li><a href="#">Link Here</a></li> |
12 | <li><a href="#">Link Here</a></li> |
13 | <li><a href="#">Link Here</a></li> |
14 | <li><a href="#">Link Here</a></li> |
15 | <li><a href="#">Link Here</a></li> |
18 | <li><a href="#">Link Here</a></li> |
19 | <li><a href="#">Link Here</a></li> |
20 | <li><a href="#">Link Here</a></li> |
21 | <li><a href="#">Link Here</a></li> |
22 | <li><a href="#">Link Here</a></li> |
24 | </div> <!-- end #sidebar --> |
We will again do the same thing for the footer area. Copy and cut the
footer div and place it into the footer.php file we created in the same
includes folder.
Here is the footer.php code:
2 | <p>Copyright © 2010 <a href="#">Website Name</a></p> |
3 | </div> <!-- end #footer --> |
Now with all of our elements taken from the index.html file and added
to the different php files, the final index.html should look like this:
7 | <meta http-equiv="content-type" content="text/html; charset=utf-8" /> |
9 | <meta name="description" content="" /> |
11 | <meta name="keywords" content="" /> |
13 | <meta name="author" content="" /> |
15 | <link rel="stylesheet" type="text/css" href="style.css" media="screen" /> |
17 | <title>1stWebDesigner PHP Template</title> |
25 | <?php include('includes/header.php'); ?> |
27 | <?php include('includes/nav.php'); ?> |
37 | <h3>Paragraph Element</h3> |
41 | Quisque
pellentesque sodales aliquam. Morbi mollis neque eget arcu egestas non
ultrices neque volutpat. Nam at nunc lectus, id vulputate purus. In et
turpis ac mauris viverra iaculis. Cras sed elit a purus ultrices iaculis
eget sit amet dolor. Praesent ac libero dolor, id viverra libero.
Mauris aliquam nibh vitae eros sodales fermentum. Fusce cursus est
varius ante vehicula eget ultrices felis eleifend. Nunc pharetra rutrum
nibh et lobortis. Morbi vitae venenatis velit. |
47 | Quisque
pellentesque sodales aliquam. Morbi mollis neque eget arcu egestas non
ultrices neque volutpat. Nam at nunc lectus, id vulputate purus. In et
turpis ac mauris viverra iaculis. Cras sed elit a purus ultrices iaculis
eget sit amet dolor. Praesent ac libero dolor, id viverra libero.
Mauris aliquam nibh vitae eros sodales fermentum. Fusce cursus est
varius ante vehicula eget ultrices felis eleifend. Nunc pharetra rutrum
nibh et lobortis. Morbi vitae venenatis velit. |
51 | <h3>Another Heading Starting Point</h3> |
55 | Quisque
pellentesque sodales aliquam. Morbi mollis neque eget arcu egestas non
ultrices neque volutpat. Nam at nunc lectus, id vulputate purus. In et
turpis ac mauris viverra iaculis. Cras sed elit a purus ultrices iaculis
eget sit amet dolor. Praesent ac libero dolor, id viverra libero.
Mauris aliquam nibh vitae eros sodales fermentum. Fusce cursus est
varius ante vehicula eget ultrices felis eleifend. Nunc pharetra rutrum
nibh et lobortis. Morbi vitae venenatis velit. |
61 | Quisque
pellentesque sodales aliquam. Morbi mollis neque eget arcu egestas non
ultrices neque volutpat. Nam at nunc lectus, id vulputate purus. In et
turpis ac mauris viverra iaculis. Cras sed elit a purus ultrices iaculis
eget sit amet dolor. Praesent ac libero dolor, id viverra libero.
Mauris aliquam nibh vitae eros sodales fermentum. Fusce cursus est
varius ante vehicula eget ultrices felis eleifend. Nunc pharetra rutrum
nibh et lobortis. Morbi vitae venenatis velit. |
67 | <?php include('includes/sidebar.php'); ?> |
69 | <?php include('includes/footer.php'); ?> |
Step Ten
Now that our index.html is properly sliced, we can rename the index.html file to index.php
Now that we have created this template, as long as the php includes
are on any page we only have to modify the one single file to make it
visible accross your entire website. This again is good for anyone with a
lot of content and pages. Instead of having to edit the sidebar on
every page of your site you can now just edit the sidebar.php file and
it will reflect on all of your pages. This makes it a lot easier to keep
up with large portions of website material.
Our folder should now look like this:
Creating PHP Variables for the template
Now we will make it a little more dynamic and even easier to be able
to modify when needed. Lets take a look at the header.php file inside
the includes folder.
3 | <h2>1stWebDesigner PHP Template</h2> |
5 | </div> <!-- end #header --> |
We are going to modify this a little bit to change the H2 heading
from a different file using a variable. Creating a variable is good for
areas on your website that may change more than others. It may also be a
good way to allow clients to edit a single file to change certain items
on their website.
Now let’s replace the text within the H2 heading to this:
1 | <h2><?php echo $heading ?></h2> |
Now our header.php file will look like this: Notice we placed the
echo php command within the H2 brackets. This will give our variable
output the H2 heading we want.
3 | <h2><?php echo $heading ?></h2> |
5 | </div> <!-- end #header --> |
Next we are going to open up the file inside of the variables folder that we created named variables.php
We will add the variable that we are going to echo on the website heading. I have named this variable heading.
variables.php
3 | $heading='1stWebDesigner PHP Template'; |
Now, at any time we want to change what is titled on the heading of
our template, we can simply open our variables.php file and modify what
is between the quotes. This will always be the output on our header.php
file where we placed the echo command.
One step Further
Now we will do the same thing to our footer.php file. Open the
footer.php that we have in our includes folder and let’s take a look at
it:
2 | <p>Copyright © 2010 <a href="#">Website Name</a></p> |
3 | </div> <!-- end #footer --> |
Let’s change this like we did the header file, and add a variable to use.
We will place our echo command within the paragraph brackets. You should now have the following in your footer.php:
2 | <p><?php echo $footer ?></p> |
3 | </div> <!-- end #footer --> |
And again we will visit our variables.php file located in the
variables folder we made and we will now update it with our new
variable. The final should now look like this:
variables.php
3 | $heading='1stWebDesigner PHP Template'; |
5 | $footer='Copyright © 2010 1stWebDesigner PHP Template'; |
Make note of the above. When using PHP variables we cannot use a
regular quote. They should be replaced as you see above directly after
the a href=
This is to ensure the code is read properly by browsers. If you use a regular quote it will not work.
Making it all work
The last thing we need to do in order to make our variables work is
to do one last php include within our template to call the variables
file.
Let’s open up our header.php file and add the following:
1 | <?php include('variables/variables.php'); ?> |
This will tell our template to use the variables file we have created.
The header.php file should now look like this:
1 | <?php include('variables/variables.php'); ?> |
5 | <h2><?php echo $heading ?></h2> |
7 | </div> <!-- end #header --> |
Next we will need to do the same to our footer.php file. Add the same
include at the top. The footer.php should now look like this:
1 | <?php include('variables/variables.php'); ?> |
4 | <p><?php echo $footer ?></p> |
5 | </div> <!-- end #footer --> |
Now that these two files are calling the variables, you will see the
reflected results in the final template. You can always create new
variables, and create any type of php files you want. You can even
change the folder directory in any way you wish as long as your php
include function displays the correct path to the files.
Playing with the PHP template
To test it a bit further let’s duplicate the index.html file and make
a second page that will also call the external php files. This way we
will be able to see more exactly how this works.
Make a copy of your index.php file and rename the new file to about.php
Inside of this file you can change anything you want within the #content div inside of the website #wrapper
I have created the following for testing purposes:
7 | <meta http-equiv="content-type" content="text/html; charset=utf-8" /> |
9 | <meta name="description" content="" /> |
11 | <meta name="keywords" content="" /> |
13 | <meta name="author" content="" /> |
15 | <link rel="stylesheet" type="text/css" href="style.css" media="screen" /> |
17 | <title>1stWebDesigner PHP Template About Page</title> |
25 | <?php include('includes/header.php'); ?> |
27 | <?php include('includes/nav.php'); ?> |
35 | Quisque
pellentesque sodales aliquam. Morbi mollis neque eget arcu egestas non
ultrices neque volutpat. Nam at nunc lectus, id vulputate purus. In et
turpis ac mauris viverra iaculis. Cras sed elit a purus ultrices iaculis
eget sit amet dolor. Praesent ac libero dolor, id viverra libero.
Mauris aliquam nibh vitae eros sodales fermentum. Fusce cursus est
varius ante vehicula eget ultrices felis eleifend. Nunc pharetra rutrum
nibh et lobortis. Morbi vitae venenatis velit. |
41 | Quisque
pellentesque sodales aliquam. Morbi mollis neque eget arcu egestas non
ultrices neque volutpat. Nam at nunc lectus, id vulputate purus. In et
turpis ac mauris viverra iaculis. Cras sed elit a purus ultrices iaculis
eget sit amet dolor. Praesent ac libero dolor, id viverra libero.
Mauris aliquam nibh vitae eros sodales fermentum. Fusce cursus est
varius ante vehicula eget ultrices felis eleifend. Nunc pharetra rutrum
nibh et lobortis. Morbi vitae venenatis velit. |
45 | <h3>Another Heading Starting Point</h3> |
49 | Quisque
pellentesque sodales aliquam. Morbi mollis neque eget arcu egestas non
ultrices neque volutpat. Nam at nunc lectus, id vulputate purus. In et
turpis ac mauris viverra iaculis. Cras sed elit a purus ultrices iaculis
eget sit amet dolor. Praesent ac libero dolor, id viverra libero.
Mauris aliquam nibh vitae eros sodales fermentum. Fusce cursus est
varius ante vehicula eget ultrices felis eleifend. Nunc pharetra rutrum
nibh et lobortis. Morbi vitae venenatis velit. |
55 | Quisque
pellentesque sodales aliquam. Morbi mollis neque eget arcu egestas non
ultrices neque volutpat. Nam at nunc lectus, id vulputate purus. In et
turpis ac mauris viverra iaculis. Cras sed elit a purus ultrices iaculis
eget sit amet dolor. Praesent ac libero dolor, id viverra libero.
Mauris aliquam nibh vitae eros sodales fermentum. Fusce cursus est
varius ante vehicula eget ultrices felis eleifend. Nunc pharetra rutrum
nibh et lobortis. Morbi vitae venenatis velit. |
59 | <h3>Notice The Include Files</h3> |
63 | Quisque
pellentesque sodales aliquam. Morbi mollis neque eget arcu egestas non
ultrices neque volutpat. Nam at nunc lectus, id vulputate purus. In et
turpis ac mauris viverra iaculis. Cras sed elit a purus ultrices iaculis
eget sit amet dolor. Praesent ac libero dolor, id viverra libero.
Mauris aliquam nibh vitae eros sodales fermentum. Fusce cursus est
varius ante vehicula eget ultrices felis eleifend. Nunc pharetra rutrum
nibh et lobortis. Morbi vitae venenatis velit. |
67 | <h3>Another Heading Starting Point</h3> |
71 | Quisque
pellentesque sodales aliquam. Morbi mollis neque eget arcu egestas non
ultrices neque volutpat. Nam at nunc lectus, id vulputate purus. In et
turpis ac mauris viverra iaculis. Cras sed elit a purus ultrices iaculis
eget sit amet dolor. Praesent ac libero dolor, id viverra libero.
Mauris aliquam nibh vitae eros sodales fermentum. Fusce cursus est
varius ante vehicula eget ultrices felis eleifend. Nunc pharetra rutrum
nibh et lobortis. Morbi vitae venenatis velit. |
77 | Quisque
pellentesque sodales aliquam. Morbi mollis neque eget arcu egestas non
ultrices neque volutpat. Nam at nunc lectus, id vulputate purus. In et
turpis ac mauris viverra iaculis. Cras sed elit a purus ultrices iaculis
eget sit amet dolor. Praesent ac libero dolor, id viverra libero.
Mauris aliquam nibh vitae eros sodales fermentum. Fusce cursus est
varius ante vehicula eget ultrices felis eleifend. Nunc pharetra rutrum
nibh et lobortis. Morbi vitae venenatis velit. |
83 | <?php include('includes/sidebar.php'); ?> |
85 | <?php include('includes/footer.php'); ?> |
Now make sure that we go inside of our nav.php file as well as the
sidebar.php file and link the new page we have just created. Again using
your html editor of choice, first open up your nav.php file.
Updating the links should make your file now look like this example below:
nav.php
3 | <a href="index.php">Home</a> |
4 | <a href="about.php">About</a> |
5 | <a href="#">Portfolio</a> |
6 | <a href="#">Contact</a> |
8 | </div> <!-- end #nav --> |
Next we will need to do the same thing to our sidebar.php file to make sure the links now work.
sidebar.php
4 | <li><a href="index.php">Home</a></li> |
5 | <li><a href="about.php">About Us</a></li> |
6 | <li><a href="#">Links</a></li> |
7 | <li><a href="#">Portfolio</a></li> |
8 | <li><a href="#">Contact</a></li> |
11 | <li><a href="#">Link Here</a></li> |
12 | <li><a href="#">Link Here</a></li> |
13 | <li><a href="#">Link Here</a></li> |
14 | <li><a href="#">Link Here</a></li> |
15 | <li><a href="#">Link Here</a></li> |
18 | <li><a href="#">Link Here</a></li> |
19 | <li><a href="#">Link Here</a></li> |
20 | <li><a href="#">Link Here</a></li> |
21 | <li><a href="#">Link Here</a></li> |
22 | <li><a href="#">Link Here</a></li> |
24 | </div> <!-- end #sidebar --> |
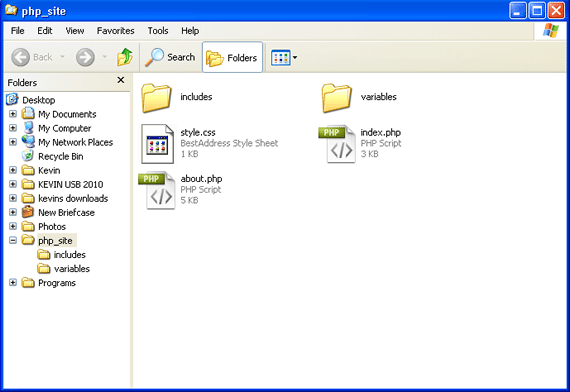
Now we are complete. We have created a two page PHP website template
that we can expand on more to make a completed project. We have learned
how to use basic php includes and variables to be able to edit content
accross many different pages at one time. I really hope you have enjoyed
this post and learned something from it as well.
Just to take a final look at the new file structure with the added page you can view the image below for reference:
This tutorial was created to give you some basic knowledge on php and creating a php website template.
If you have any questions I will do my best to answer them in the comments below.


